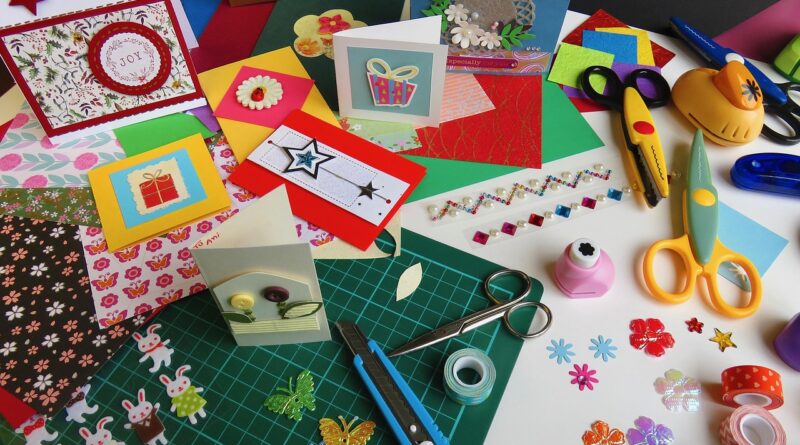
Art and craft card making guide for clean designs and reliable results
What art and craft card making covers
Art and craft card making is the process of designing, cutting, decorating, and finishing handmade cards for birthdays, holidays, invitations, thank-you notes, announcements, and small gifts. Strong results usually start with the format: choose the finished size first, then match the paper weight, adhesive, printed artwork, embellishments, and envelope to that size. A clean handmade card does not require a large studio or expensive machine. It depends more on accurate measuring, controlled layers, safe materials, and a final check before mailing. For readers exploring practical maker projects beyond paper craft, the DIY Tech section offers related ideas for tools, workflows, and home creative setups.
This guide focuses on a repeatable workflow rather than one decorative style. It covers how to choose a card format, build a useful toolkit, combine handmade and digital elements, avoid common construction problems, and prepare cards that can withstand handling, display, or postal delivery.

Start with the card format before choosing decorations
Many card making problems begin when the decoration is chosen before the card size. A heavy shaker window, thick foam tape, or tall bow may look appealing on a worktable, but it can make the finished envelope too bulky or rigid for regular mailing. A better method is to define the finished size, fold direction, envelope, and delivery method before cutting the first panel.
Two sizing systems often appear in card making discussions. In U.S. craft use, an A2 card usually means a folded card measuring 4.25 by 5.5 inches, made from half of a U.S. Letter sheet. In international paper sizing, A2 is a much larger ISO sheet size, so makers should check the context before ordering envelopes or templates. ISO sizes such as A5 and A6 are widely used outside North America because each size is half of the previous A-series sheet.
| Common format | Typical finished size | Why makers use it | Practical note |
|---|---|---|---|
| U.S. A2 folded card | 4.25 x 5.5 in | Efficient use of Letter cardstock | Good for everyday greeting cards and simple envelopes |
| 5 x 7 in card | 5 x 7 in | More space for photos, invitations, and layered designs | Heavier layers may need extra mailing attention |
| Square card | Often 5 x 5 in or 6 x 6 in | Balanced composition for wreaths, mandalas, and centered designs | Square envelopes may be treated differently by postal services |
| ISO A6 card | 105 x 148 mm | Compact international format | Often made by folding an A5 sheet |
| Mini note card | Varies by project | Useful for gift tags and packaging inserts | Check minimum mailing size if it will be posted alone |
For beginners, the safest starting point is one standard folded size and one matching envelope type. Repeating the same format makes it easier to compare paper, printer settings, scoring depth, die placement, and decoration thickness from project to project.
Build a small tool kit that scales
A good card making setup is not the same as a large supply collection. The most useful tools are the ones that improve measuring, cutting, folding, bonding, and repeatability. Start with a sharp craft knife or paper trimmer, a ruler with clear markings, a self-healing cutting mat, a bone folder or scoring tool, and a small selection of adhesives. Add decorative tools only after the basic workflow feels reliable.
Paper and cardstock
Cardstock is the structural base of most handmade cards. Smooth white cardstock works well for stamping, printing, and clean minimalist designs. Colored cardstock adds impact without requiring full-coverage ink. Textured cardstock can make a card feel more premium, but it may not print sharply and can resist some adhesives. Patterned paper is usually better as a panel or accent than as the entire card base, unless it is thick enough to stand without curling.
Paper weight should match the card function. The base needs enough stiffness to stand upright, while inner writing panels can be lighter. Very heavy layers feel substantial, but they add thickness at the fold and can push the card beyond envelope or postage limits. When testing a new paper, score it, fold it, stamp it, and glue a small sample before committing to a full batch.
Adhesives and dimension
Adhesive choice affects both appearance and durability. Tape runners are clean and fast for flat panels. Liquid glue gives more positioning time, but it can warp thin paper if applied too heavily. Foam tape creates shadow and dimension, especially under sentiments and focal images, but it increases thickness quickly. Glue dots work well for buttons, sequins, and small embellishments, provided the object is safe for the recipient and suitable for the mailing method.
A practical approach is to use stronger adhesive for structural layers and lighter adhesive for decorative layers. If a card includes ribbon, acetate, vellum, or glitter paper, test adhesion first because some surfaces reject standard tape. For cards that will be mailed, press the finished piece under a clean book after the glue dries to help the panels stay flat.
Cutting, scoring, stamping, and embossing tools
Scoring before folding is one of the simplest ways to make handmade cards look cleaner. A scored fold reduces cracking, especially on darker cardstock and printed panels. Stamps, dies, punches, embossing folders, and stencils can add repeatable detail, but they work best when they are planned around the card size instead of forced into leftover space.
Heat embossing can create a raised glossy effect, but it adds a safety and workflow step. Use a proper heat tool on a stable surface, keep powders away from children and pets, and allow the card to cool before stacking. A household hair dryer is usually not a good substitute because it moves too much air and can scatter embossing powder before it melts.
A practical workflow from idea to finished card
A repeatable workflow saves time and reduces waste, especially when making multiple cards for an event. The sequence below works for simple greeting cards, invitations, holiday sets, and mixed-media cards.
- Define the purpose. Decide whether the card will be displayed, mailed, hand-delivered, or placed inside packaging.
- Choose the finished size. Match the base to an envelope before adding decoration.
- Sketch the front panel. Mark the focal point, sentiment area, and any moving or raised element.
- Cut and score the base. Keep the fold straight and check that the card stands evenly.
- Prepare printed or stamped elements. Let ink dry fully before cutting, coloring, or applying adhesive.
- Build from flat to raised layers. Attach background panels first, then focal images, then small embellishments.
- Check thickness and balance. Close the card and slide it into the envelope before adding final details.
- Finish the inside. Add a writing panel if the base is dark, textured, or hard to write on.
For batch projects, complete one prototype before cutting all materials. A prototype shows whether the sentiment is readable, the layers align, the fold resists cracking, and the envelope can close. Once the first card works, create a cutting list and produce the remaining cards assembly-line style.
Design decisions that make handmade cards look cleaner
Professional-looking cards usually depend more on spacing and restraint than on expensive supplies. Leave consistent borders around panels. Align the sentiment to a visible edge or center line. Use one clear focal image instead of several competing decorations. Repeat one color from the patterned paper in the sentiment, ribbon, or mat layer so the design feels intentional.
Contrast is especially important. Pale ink on pale paper may look soft in person but disappear in photos or dim light. If the card includes a printed photo, use a simple mat to separate it from busy patterned paper. If the design includes metallic foil, glitter, or glossy embossing, keep nearby areas calmer so the reflective element becomes the highlight rather than visual noise.
Layering also needs control. A flat background, one raised focal layer, and one small accent are often enough. Too many foam layers can make the card unstable and difficult to mail. If dimension is important, place raised elements away from the fold and avoid concentrating all weight on one corner.
Typography should be treated as part of the design, not as an afterthought. Choose readable fonts for printed sentiments. Avoid stretching type to fill space. For stamped sentiments, test on scrap paper and clean the stamp before using it on the finished panel. A slightly imperfect handmade texture is acceptable; a crooked sentiment on an otherwise geometric card is more noticeable.
Use digital tools without losing the handmade feel
Card making fits naturally into a DIY Tech workflow because digital tools can improve planning while the final object remains handmade. A tablet or basic drawing app can help test color palettes and layout before cutting paper. A home printer can produce custom sentiments, patterned backgrounds, calendar dates, maps, or photo panels. A desktop cutting machine can repeat complex shapes more accurately than hand cutting, especially for batches. See also: Gadgets.
Digital files should be prepared with the final card size in mind. Use high-resolution images for photos, and avoid enlarging small graphics beyond their original quality. Leave enough margin for printer limitations because many home printers cannot print to the edge of every paper size. Print one draft on plain paper first, cut it to size, and place it on the card base to check scale before using premium cardstock.
For cutting machines, calibration matters more than the number of designs in a library. Test blade depth, mat stickiness, and pressure settings on scraps from the same cardstock. Intricate cuts may tear if the paper is fibrous, damp, or too thin. Simple shapes often look better and waste less material than fragile lace-style cuts that do not release cleanly.
Other useful tech tools are less obvious. A small LED light pad can help with tracing and alignment. A scanner or phone camera can archive successful layouts. A label maker can organize dies, stamps, and paper scraps by size or theme. None of these tools replaces design judgment, but each can make the process more consistent.
Safety, durability, and mailing checks
Safety matters in art and craft card making because cards often involve blades, adhesives, powders, inks, heat, small parts, and sometimes children. In the United States, CPSC guidance and art-material labeling rules make the phrase Conforms to ASTM D-4236 important for art supplies because it indicates that labeling for chronic health hazards has been addressed. This does not mean a material is edible, suitable for every age, or free of all risk. It means the product has been evaluated and labeled under the relevant art-material standard.
For family projects, choose age-appropriate materials, supervise cutting and heat tools, and avoid small detachable embellishments on cards for young children. Powders, glitter, solvent-based markers, sprays, and strong adhesives should be handled with ventilation and stored securely. If a product carries cautionary wording, follow it rather than assuming all craft supplies are interchangeable.
Durability is the second safety-related issue. A card with loose gems, sharp wire, exposed staples, or poorly attached metal charms can scratch surfaces or detach in an envelope. If a card is meant to be displayed, make sure it stands without tipping. If it is meant to be mailed, close the envelope and feel for lumps, hard edges, and uneven thickness.
U.S. mailing rules are another practical constraint. USPS letter-size mail has maximum physical limits, and square, rigid, lumpy, or unusually shaped envelopes may require nonmachinable handling or extra postage. Postal prices and interpretations can change, so check current requirements before mailing thick handmade cards, cards with buttons, shaker elements, wax seals, or rigid inserts. When in doubt, hand-carry special cards or ask a postal counter to assess the finished envelope.
Common mistakes and how to prevent them
The most common beginner mistake is using too much adhesive. Excess liquid glue can ripple paper, stain vellum, or squeeze out at the edges. Apply glue in thin lines or small dots, then spread pressure evenly. Another frequent problem is cutting panels after decorating them. It is safer to cut and test the panel first, then stamp, color, or embellish it.
Color overload is also common. A card can include many supplies and still look unfinished if the colors do not relate to each other. Limit the palette to two main colors, one neutral, and one accent until the layout is working. If patterned paper feels busy, use it as a narrow strip, envelope liner, or small background behind a plain focal shape.
Ignoring the inside of the card is another missed opportunity. A simple inner panel, small stamped motif, or matching paper strip makes the card feel complete. However, avoid bulky elements inside the fold because they create pressure marks on the front and make the card harder to close.
Finally, many makers skip documentation. Keep a small note with the card size, paper brand or weight, ink type, cutting settings, and envelope used. This is especially helpful for wedding invitations, holiday batches, classroom cards, or any design you may want to reproduce later.
Frequently asked questions
What is the easiest card size for beginners?
A U.S. A2 folded card is one of the easiest choices for makers using Letter-size cardstock because it is efficient, widely supported by envelopes, and large enough for simple layouts. In countries that use ISO paper sizes, an A6 folded card is similarly practical.
Can I make professional-looking cards without a cutting machine?
Yes. A sharp trimmer, accurate scoring tool, clean adhesive, and thoughtful layout can produce polished cards. Cutting machines are useful for repetition and complex shapes, but they are not required for strong design.
What paper should I use for stamping and coloring?
Use smooth cardstock for crisp stamping. If coloring with alcohol markers, test for bleeding and use paper designed to handle that ink type. If using watercolor or wet media, choose heavier paper that resists warping.
Are handmade cards safe for children to make?
They can be, if the project uses age-appropriate supplies and supervision. Children should not handle sharp blades, heat tools, strong adhesives, small choking-hazard embellishments, or powders without careful adult control.
Why does my handmade card look bulky in the envelope?
Bulky cards usually have too many raised layers, uneven embellishments, or decoration placed near the fold. Reduce foam tape, move raised elements toward the center, use flatter accents, and test the envelope before final assembly.