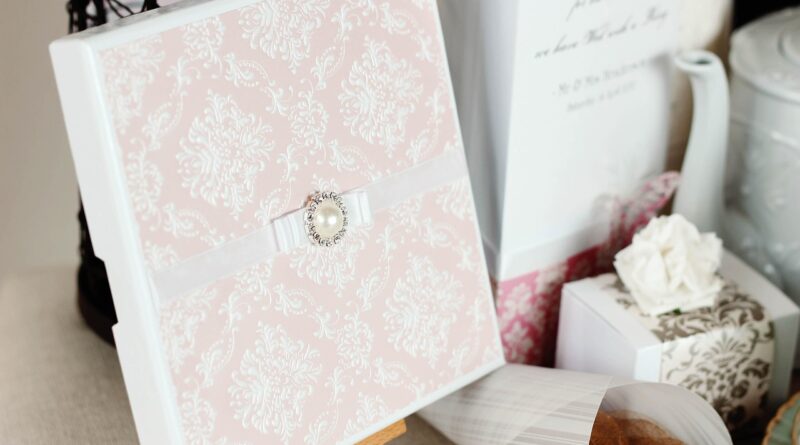
How to make wedding invitations on Cricut Maker without common print and cut mistakes
Can you make wedding invitations on Cricut Maker?
Yes, you can make wedding invitations on Cricut Maker. The best results usually come from using the machine for work it can repeat accurately: precise cutting, scoring, drawing, foil accents, belly bands, pockets, wraps, tags, and layered paper details. Cricut Maker does not print, so any printed artwork still needs to come from a home printer or a print shop.
The main planning decision is whether the invitation needs Print Then Cut precision, simple straight trimming, or mostly decorative cut layers. Cricut’s Help Center guidance for Maker series machines shows that Print Then Cut has page-size and shape limits, so it is worth checking the layout before buying paper or committing to a 100-piece suite. For more practical project guides, visit our DIY Tech section.
What Cricut Maker does well for wedding stationery
Cricut Maker is most useful when a wedding invitation suite includes shapes or operations that are hard to repeat cleanly by hand. Common examples include arched invitation cards, shaped detail cards, envelope liners, vellum wraps, pocket inserts, belly bands, monogram tags, RSVP cards, favor tags, table numbers, place cards, and signage details. For a plain rectangle with printed text only, a paper trimmer or professional printer may be faster. For a layered suite with cutouts, folds, score lines, and matching accessories, the Maker can help keep the pieces consistent.
A practical stationery workflow separates the job into three groups. The first group is print-heavy items, such as the main invitation and details card. The second is machine-cut items, such as liners, wraps, pockets, and decorative layers. The third is assembly work, including adhesive, ribbon, wax seals, and envelope addressing. This prevents the common mistake of sending every component through Print Then Cut when only some pieces need sensor-based cutting.
Choose the invitation format before designing
Before opening Design Space, decide what kind of invitation you are making. The format affects paper size, print method, cutting time, postage, and assembly workload.
| Invitation format | What Cricut Maker can do | Best use | Watchout |
|---|---|---|---|
| Flat printed card | Cut the final shape, add drawn or foil accents, or score matching inserts | Classic 5 x 7 inch invitations and detail cards | Printing still comes from a printer; straight rectangles may be faster with a trimmer |
| Print Then Cut card | Print registration marks, then cut around the printed design | Arches, ovals, scallops, illustrated cards, and labels | The design size must fit within Cricut’s Print Then Cut cuttable area |
| Layered invitation | Cut backing layers, mats, shadows, monograms, and overlays | Premium-looking suites without fully custom printing | Every layer adds material cost and mat loading time |
| Vellum wrap or belly band | Cut, score, and repeat consistent folds | Bundling invitation, RSVP, and details cards | Thin translucent materials can curl or shift if the mat is too sticky |
| Pocket or gatefold | Cut the template and score fold lines | Multi-card invitation suites | Scoring accuracy and paper grain matter for clean folds |
If the invitation is mainly typography, start with print quality and paper choice. If the invitation has a distinctive silhouette, start with the cut file. If the suite has multiple enclosures, start with the envelope size and thickness so the finished stack can be mailed without surprises.
Size and Print Then Cut limits to plan around
Cricut Maker series machines support several Print Then Cut page sizes, but the usable cuttable area is not the same as the full sheet. Cricut explains that part of the page is reserved for sensor markings, and that the maximum vertical and horizontal dimensions depend on page size and project proportions. In practical terms, a tall design may not also use the maximum width, and a wide design may not also use the maximum height.
| Material page size for Maker series | Maximum vertical dimension | Maximum horizontal dimension |
|---|---|---|
| A4, 8.3 x 11.7 in | 10.62 in | 7.2 in |
| Letter, 8.5 x 11 in | 9.94 in | 7.44 in |
| Legal, 8.5 x 14 in | 12.94 in | 7.44 in |
| Tabloid, 11 x 17 in | 15.94 in | 9.94 in |
| A3, 11.7 x 16.5 in | 15.44 in | 10.64 in |
For wedding invitations, these limits matter most when you are trying to fit multiple cards on one page. A single 5 x 7 inch design usually fits within Letter-size Print Then Cut limits, depending on orientation and bleed. Two 5 x 7 inch cards on one Letter sheet are often difficult because the registration area reduces usable space. If the card is a plain rectangle, printing multiple invitations on larger paper and trimming with a guillotine cutter may be more efficient than using Print Then Cut for every copy.
Use Print Then Cut when the machine must follow the printed artwork precisely, such as an arch border, illustrated crest, shaped menu, or sticker-style label. Use standard cut-only operations for blank backing layers, pocket pieces, liners, bands, and tags. Making that distinction can remove hours from a large batch.
Materials, tools, and settings that affect results
Most invitation projects use cardstock, specialty paper, vellum, adhesive vinyl, foil paper, acetate, or kraft board. Cricut’s material lists include settings for many of these categories, but paper can vary by brand, coating, humidity, and thickness. Cricut’s material-setting guidance recommends test cuts, which is especially important when you have a limited quantity of wedding paper in a specific color.
| Component | Useful tool or setting | Practical note |
|---|---|---|
| Main cardstock card | Fine-Point Blade with a cardstock setting | Use a clean mat and test one corner before a full batch |
| Heavy pocket or folder | Scoring Wheel or Double Scoring Wheel | Maker-compatible Scoring Wheel tools are designed for stronger crease lines than a stylus |
| Vellum wrap | Light pressure, clean mat, careful weeding | Vellum can curl; reduce handling marks and adhesive visibility |
| Foil or deboss accents | Foil Transfer Tool or Debossing Tip | Best for small accents, names, crests, borders, and monograms |
| Envelope liner | Fine-Point Blade | Cut slightly smaller than the envelope interior so the flap closes cleanly |
The Scoring Wheel and Double Scoring Wheel are Maker-family tools that require QuickSwap housing. The single wheel is generally suited to lighter, uncoated materials, while the double wheel is intended for heavier or coated stock that benefits from two parallel score lines. For invitations, this is useful when folding pocket cards, wraps, and gatefold elements.
A new or well-maintained blade matters more than many beginners expect. Fuzzy edges, drag marks, and torn corners can make a formal invitation look unfinished. If your first cuts look rough, replace or clean the blade, check that the mat is not overly worn, and confirm that the paper is firmly adhered without bubbles.
A practical workflow for making the invitations
- Define the suite. List every piece: main invitation, RSVP, details card, envelope liner, wrap, tag, and any inserts. Add extras for testing and mistakes.
- Pick the envelope first. The envelope controls finished card size, stack thickness, postage category, and how many layers you can add.
- Create a production sample. Make one complete invitation suite before cutting the full batch. Include printing, scoring, folding, adhesive, envelope stuffing, and weighing.
- Set up artwork at final size. Use actual dimensions, not approximate scaling. If using Print Then Cut, check warnings in Design Space before printing.
- Calibrate and test. For printed designs, complete Print Then Cut calibration if alignment is off. For specialty stock, run a small test cut.
- Batch similar operations. Cut all liners together, then all wraps, then all tags. Repeating the same material setting reduces errors.
- Inspect as you go. Check the first three to five pieces from every material batch for clean corners, correct scoring, and color consistency.
- Assemble in stages. Fold and burnish scored pieces, attach liners, stack inserts, then add bands or wax seals last.
- Weigh and mail-check the final piece. Use the complete invitation, not a single card, when checking thickness, rigidity, and postage.
For large orders, calculate machine loads rather than card count only. If one invitation needs a liner cut, a belly band cut, a tag cut, a score-and-cut pocket, and a Print Then Cut insert, that can become five separate operations per suite. For 100 invitations, that is 500 operations before assembly. Simplifying one layer may save more time than changing a machine setting. See also: Gadgets.
Quality controls that prevent common mistakes
The most common mistake is designing for the screen instead of the finished paper. Thin script fonts may look elegant in Design Space but print too faintly or cut too delicately. Very intricate lace borders can tear during removal from the mat. Heavy glitter cardstock may look dramatic, but it can shed, dull blades, and thicken the envelope stack.
- Keep small text printed, not cut. Names, dates, addresses, and venue details are usually cleaner when printed.
- Use cut detail for larger shapes. Monograms, frames, liners, arches, and bands are better candidates for cutting.
- Avoid too many adhesives. Thick foam tape, wax seals, and layered embellishments can affect mailing thickness and flexibility.
- Make extras. Plan spare pieces for smudged prints, mat tears, misaligned cuts, and guest-list changes.
- Check color under daylight. Cream, ivory, white, and blush papers can shift noticeably between printer settings and lighting conditions.
Paper grain is another avoidable issue. Folded pieces usually crease more cleanly with the grain than against it. If a wrap or pocket cracks along the fold, test the opposite orientation, use a lighter stock, or switch from a stylus-style score to a Maker scoring wheel.
Mailing and assembly checks for U.S. invitations
If the invitations will be mailed in the United States, USPS standards should shape the final design. The Domestic Mail Manual lists letter-size mail as at least 5 inches long, 3.5 inches high, and 0.007 inch thick, and no more than 11.5 inches long, 6.125 inches high, or 0.25 inch thick. First-Class Mail letter-size pieces over 3.5 ounces pay flat-size prices. USPS also treats certain letter-size pieces as nonmachinable, including pieces with an aspect ratio under 1.3 or over 2.5, pieces that are too rigid, and pieces with clasps, buttons, strings, or similar closures.
That does not mean you cannot use square cards, wax seals, ribbons, or heavy layered pieces. It means you should check postage before mailing the full batch. Bring a complete assembled invitation to the post office or confirm current postage requirements with USPS because surcharges and prices can change.
| Design choice | Potential mailing impact | Safer approach |
|---|---|---|
| Square envelope | Often treated as nonmachinable | Use a rectangular outer envelope if lower postage is a priority |
| Wax seal on outer envelope | Can create uneven thickness or rigidity | Use an inner wrap or ask about hand-canceling and postage |
| Multiple thick layers | May exceed letter thickness or flexibility expectations | Weigh and measure the fully assembled suite |
| Ribbon, clasp, or button | Can trigger nonmachinable handling | Keep dimensional closures inside an outer envelope or simplify |
Frequently asked questions
Is Cricut Maker good for 5 x 7 wedding invitations?
Yes, Cricut Maker can be useful for 5 x 7 invitations, especially if you are cutting arches, liners, wraps, bands, tags, or layered backers. For a simple 5 x 7 printed rectangle, a printer plus paper trimmer may be faster than Print Then Cut.
Do I need Print Then Cut for every invitation?
No. Use Print Then Cut only when the cut must align with printed artwork. For blank cardstock layers, envelope liners, vellum wraps, belly bands, and tags, a standard cut operation is usually enough.
Can Cricut Maker print the invitations?
No. Cricut Maker is a cutting and making machine, not a printer. You can print from a home printer or print shop, then use the Maker to cut, score, draw, foil, or add decorative components.
What paper is best for Cricut wedding invitations?
Medium to heavy cardstock is a common starting point, but the best choice depends on your printer, design detail, envelope thickness, and desired finish. Always test the exact paper before cutting the full batch.
How early should I start making Cricut wedding invitations?
Start early enough to allow time for paper testing, printer adjustments, machine calibration, assembly, addressing, and postage checks. Cutting may be predictable, but drying time, adhesives, reprints, and mailing tests can add several days to the project.